Editing page text
Every headline, paragraph, spec, and card on the site is now a “block” you click and type into — like a Word document made of stackable pieces. This is how you change wording on any page.
- In the left sidebar of the dashboard, click Pages, then click the page you want (Home, About, Products, and so on).
- Click directly on any text and start typing. Press Enter for a new paragraph, or Backspace on an empty line to remove one.
- Select text to get a small toolbar for bold, italic, and links.
- When you're done, click the blue Update button at the top right to save.
<angle brackets>. If something breaks, click Update is not yet pressed — just leave without saving and reopen.Phone, email, address, hours & menus
The phone number, email, shop address, hours, and the “Request a Quote” button appear in the header and footer of every page. You change them in one place — not page by page.
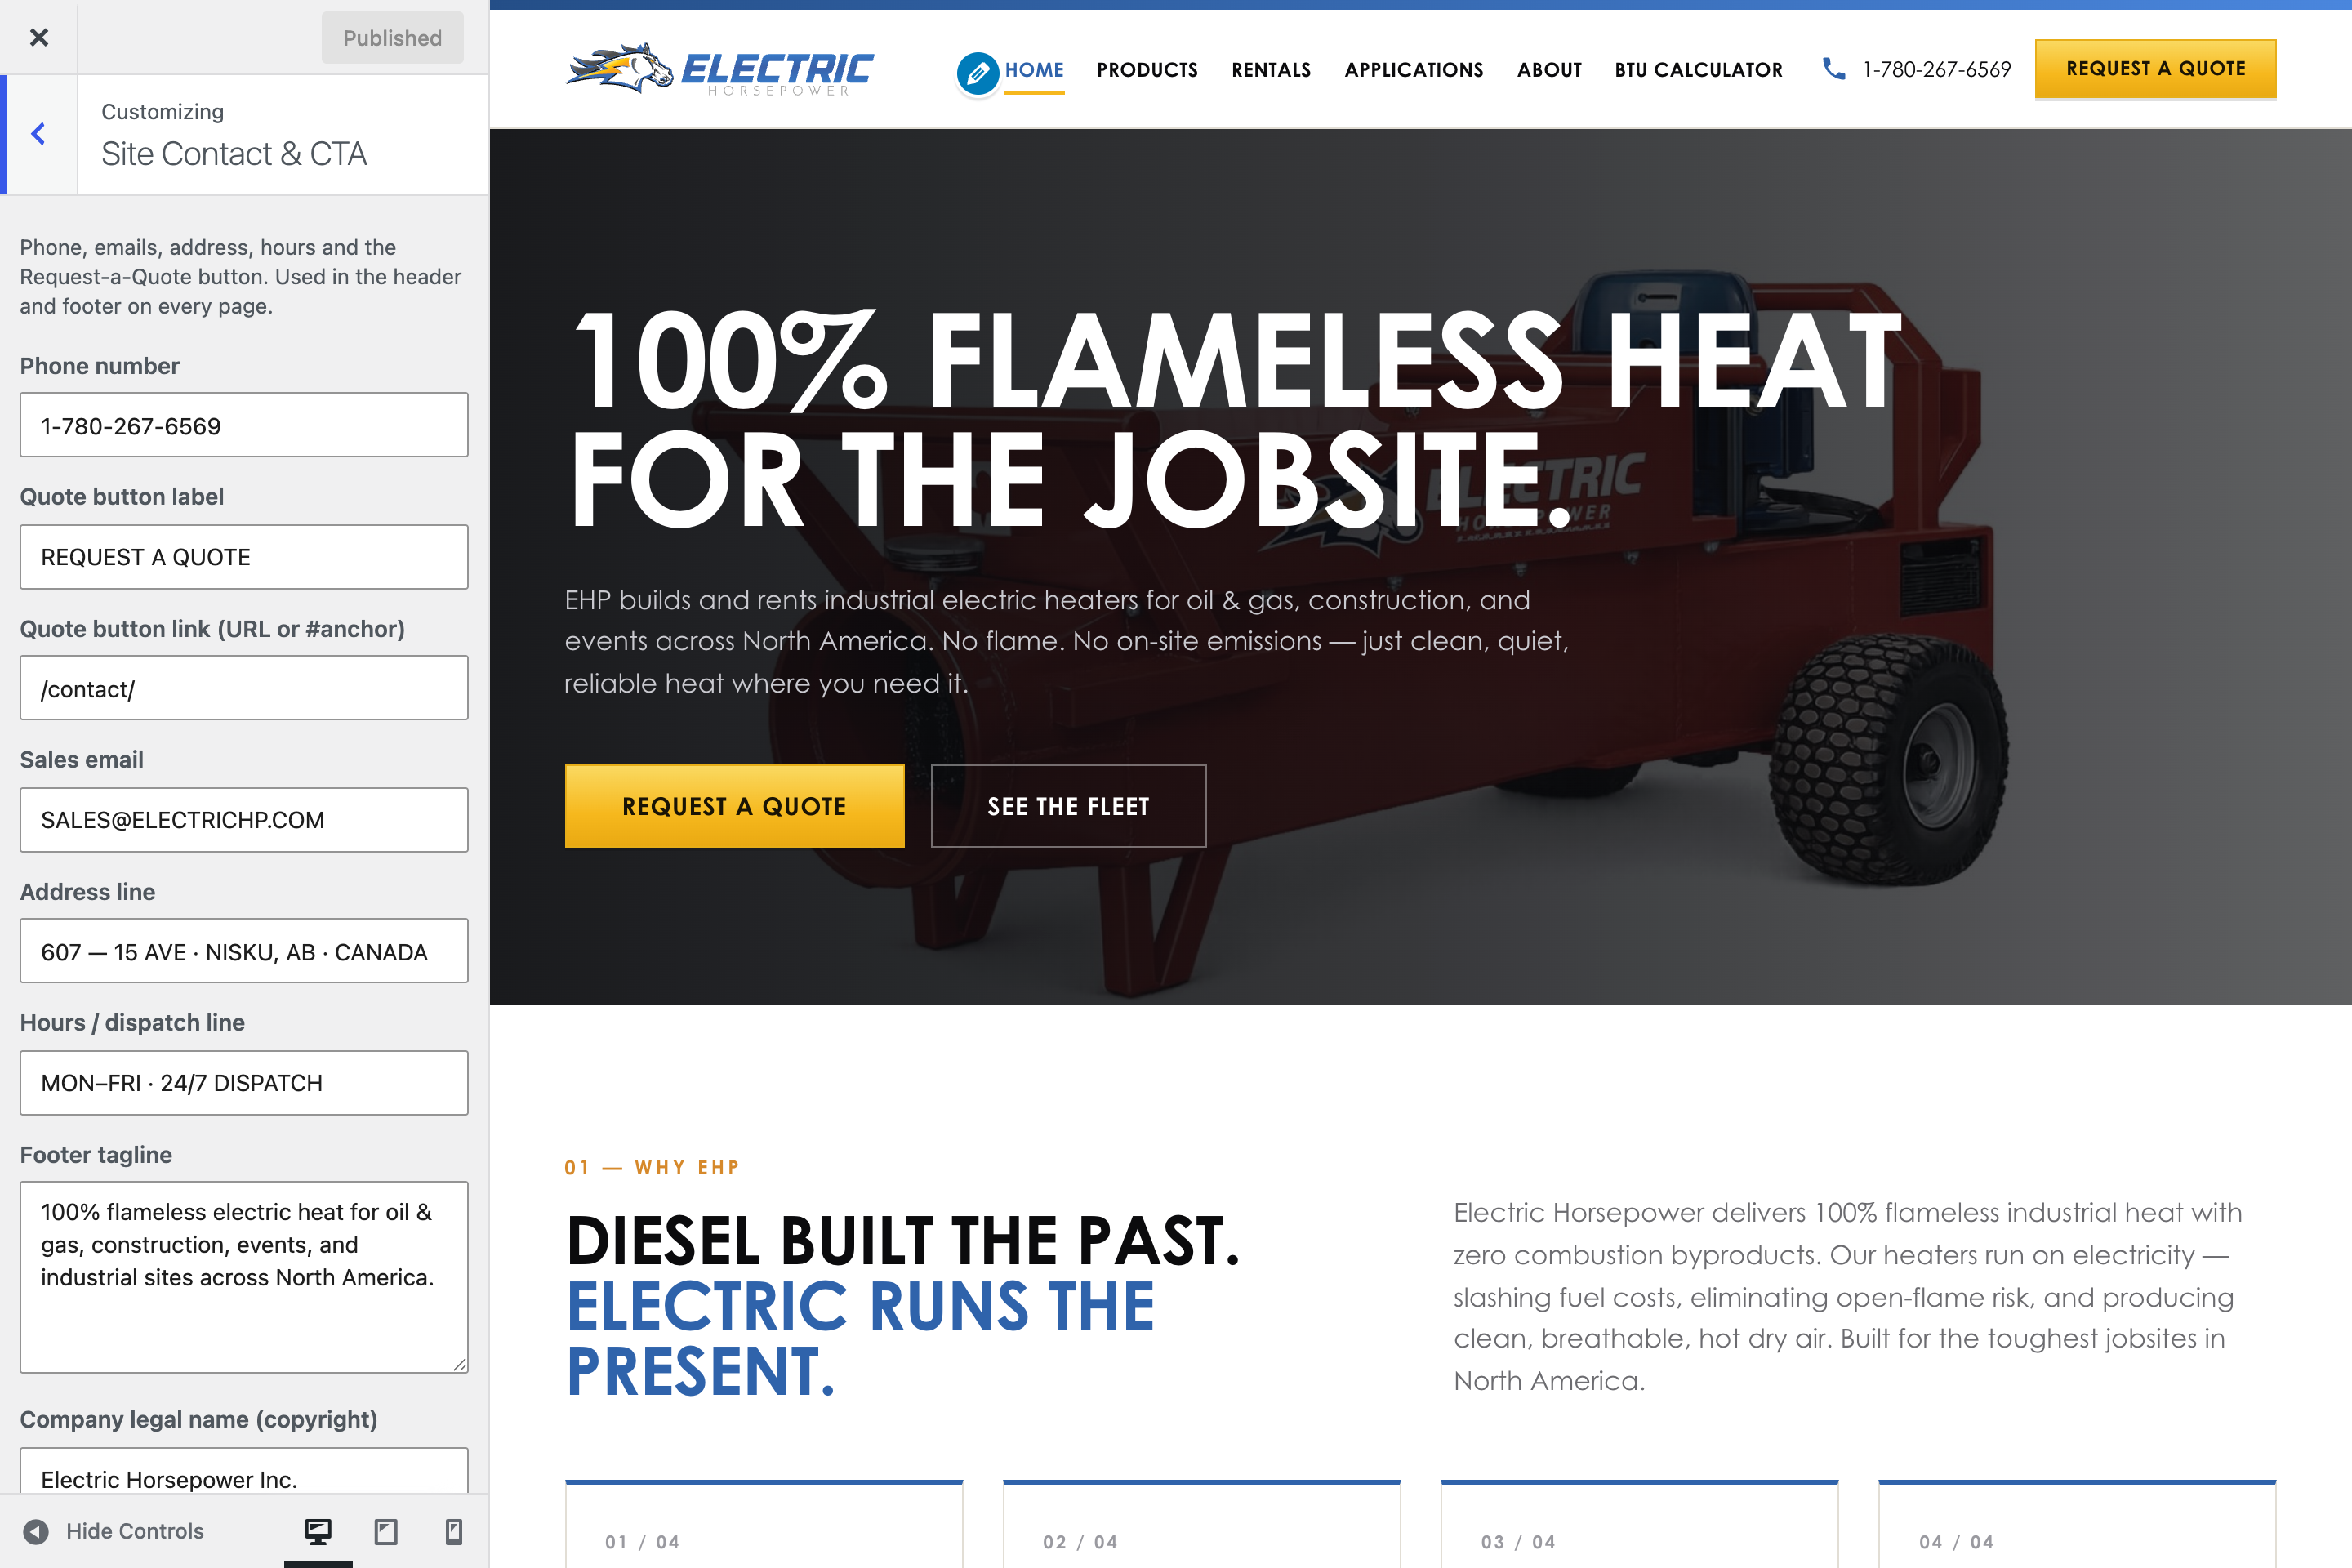
- Go to Appearance → Customize and open the Site Contact & CTA panel.
- Edit the phone, sales email, address, hours, the button label (“Request a Quote”), and where the button links.
- Click Publish at the top of the panel to save.
To change the navigation menu (the links across the top and in the footer):
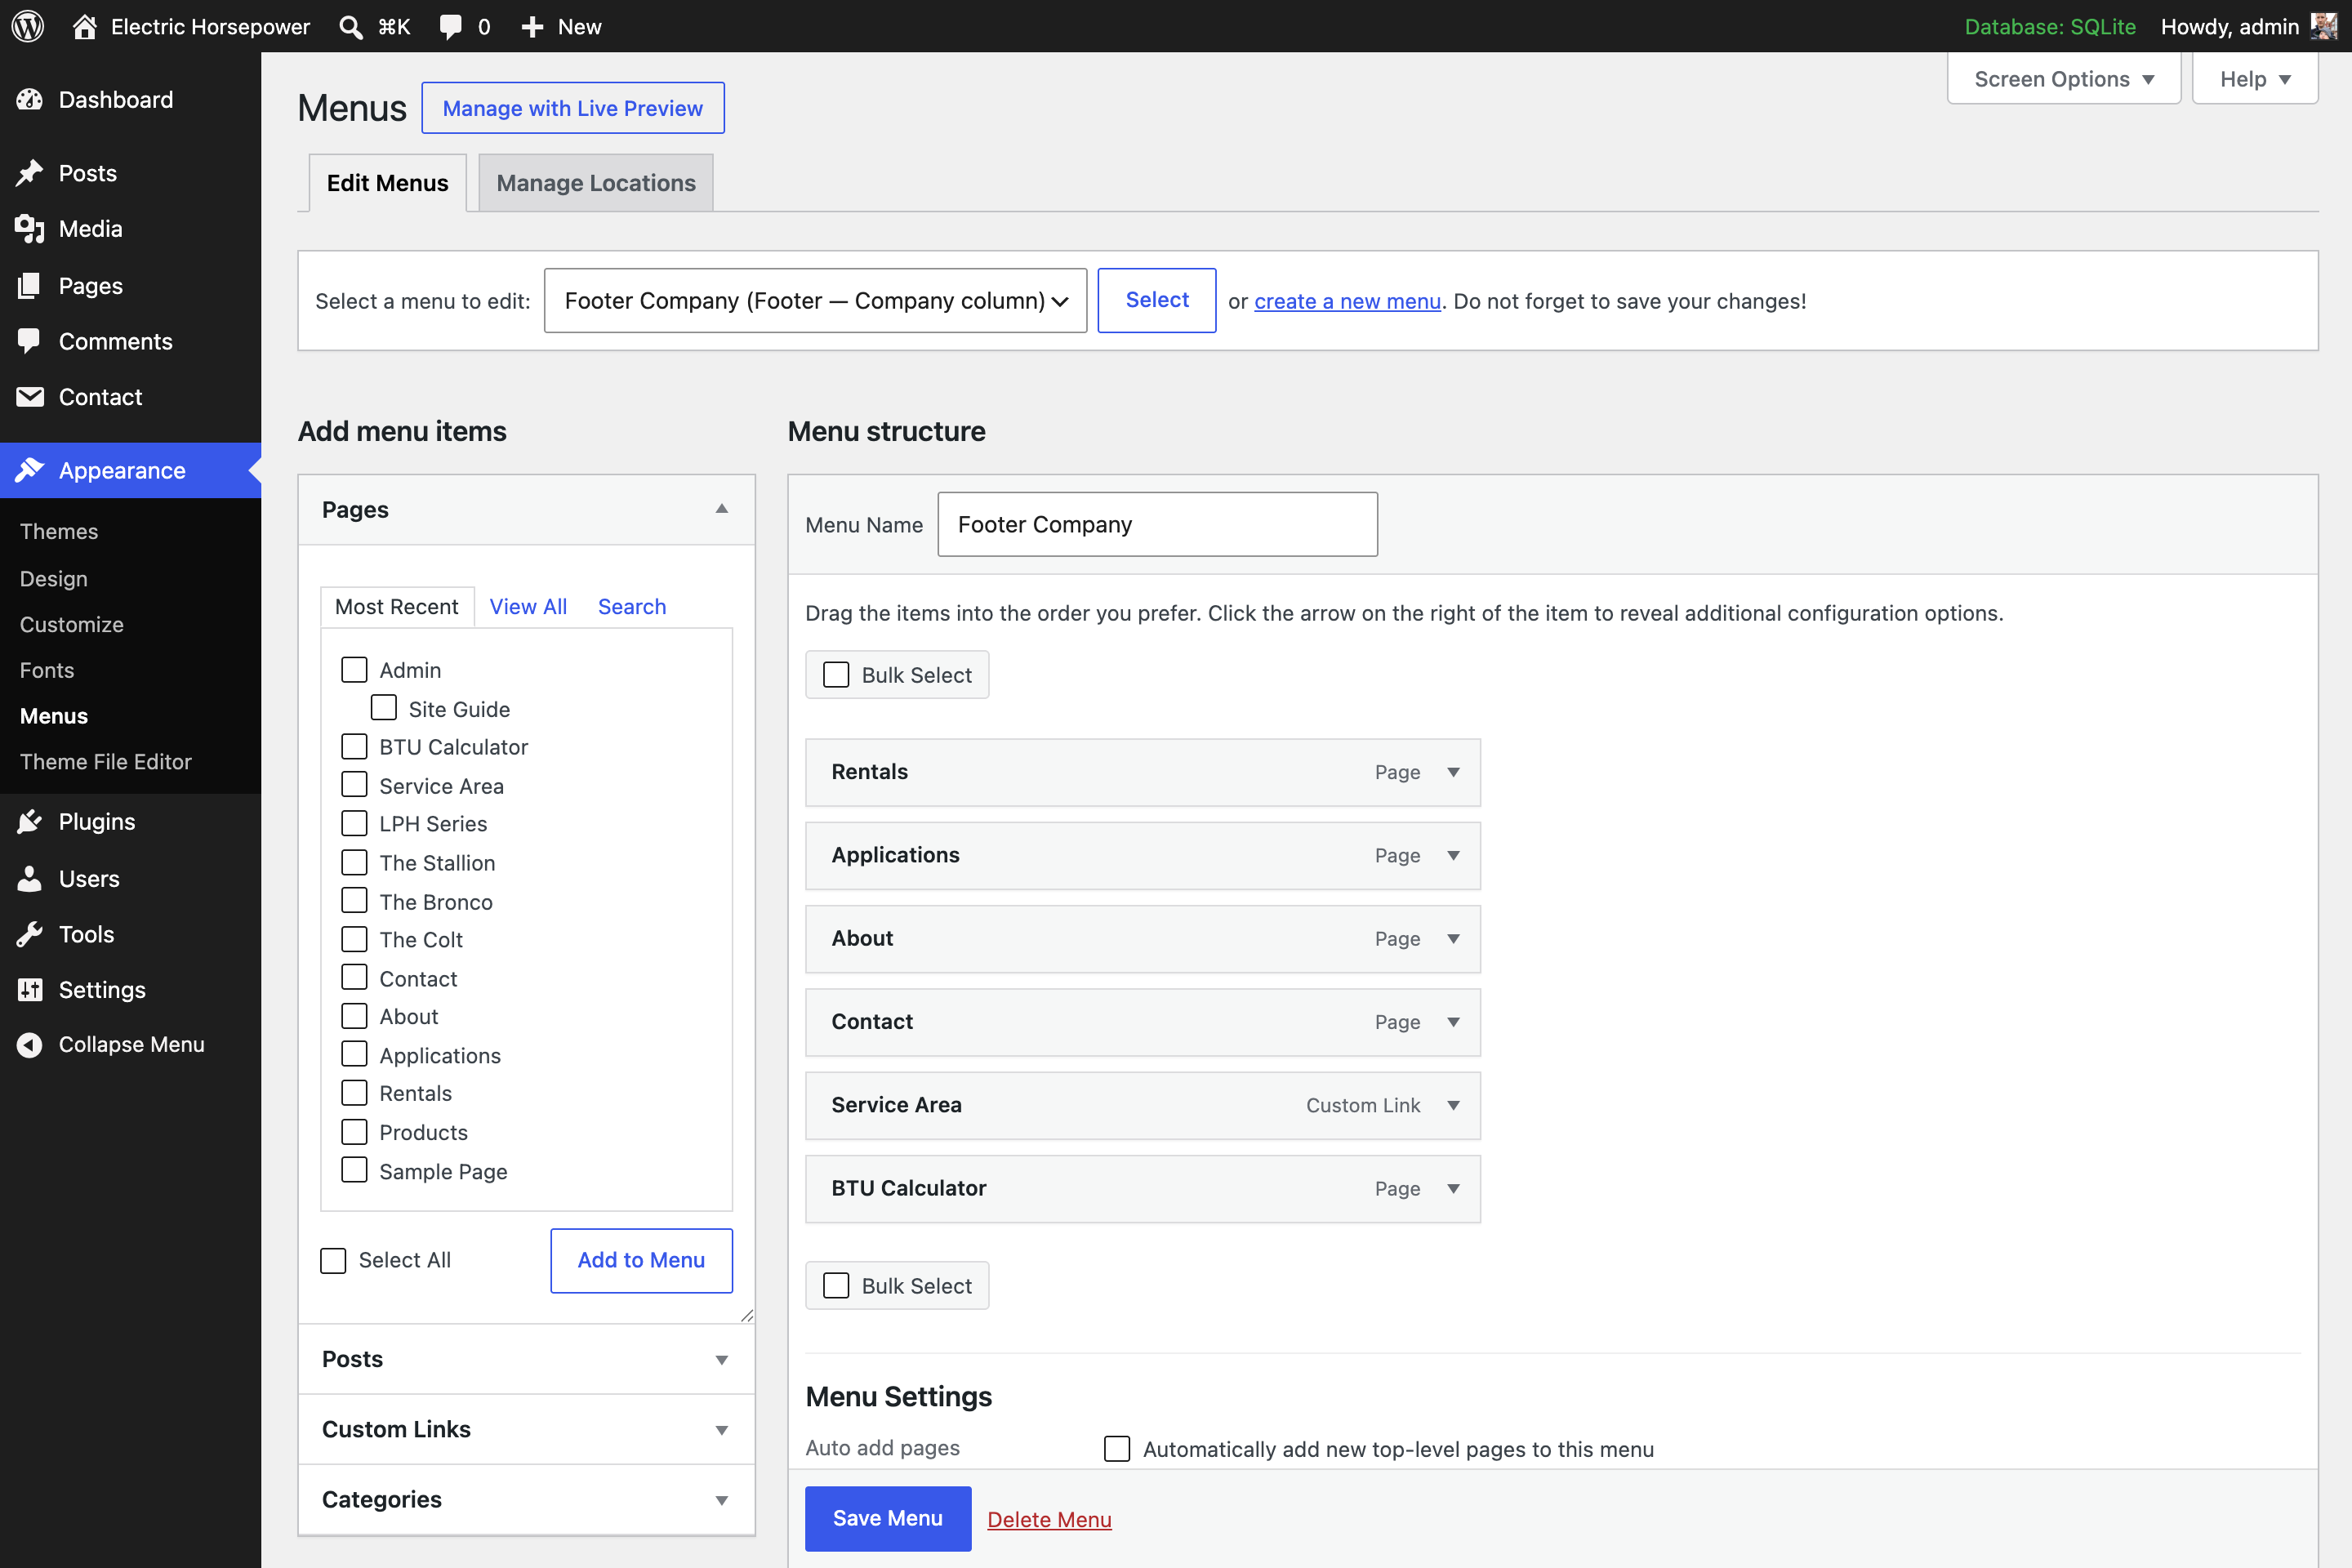
- Reorder links by dragging them; add one with Add items on the left.
- Three menus exist: the top Primary nav, plus the footer Products and Company columns.
- Click Save Menu when finished.
Product & fleet photos
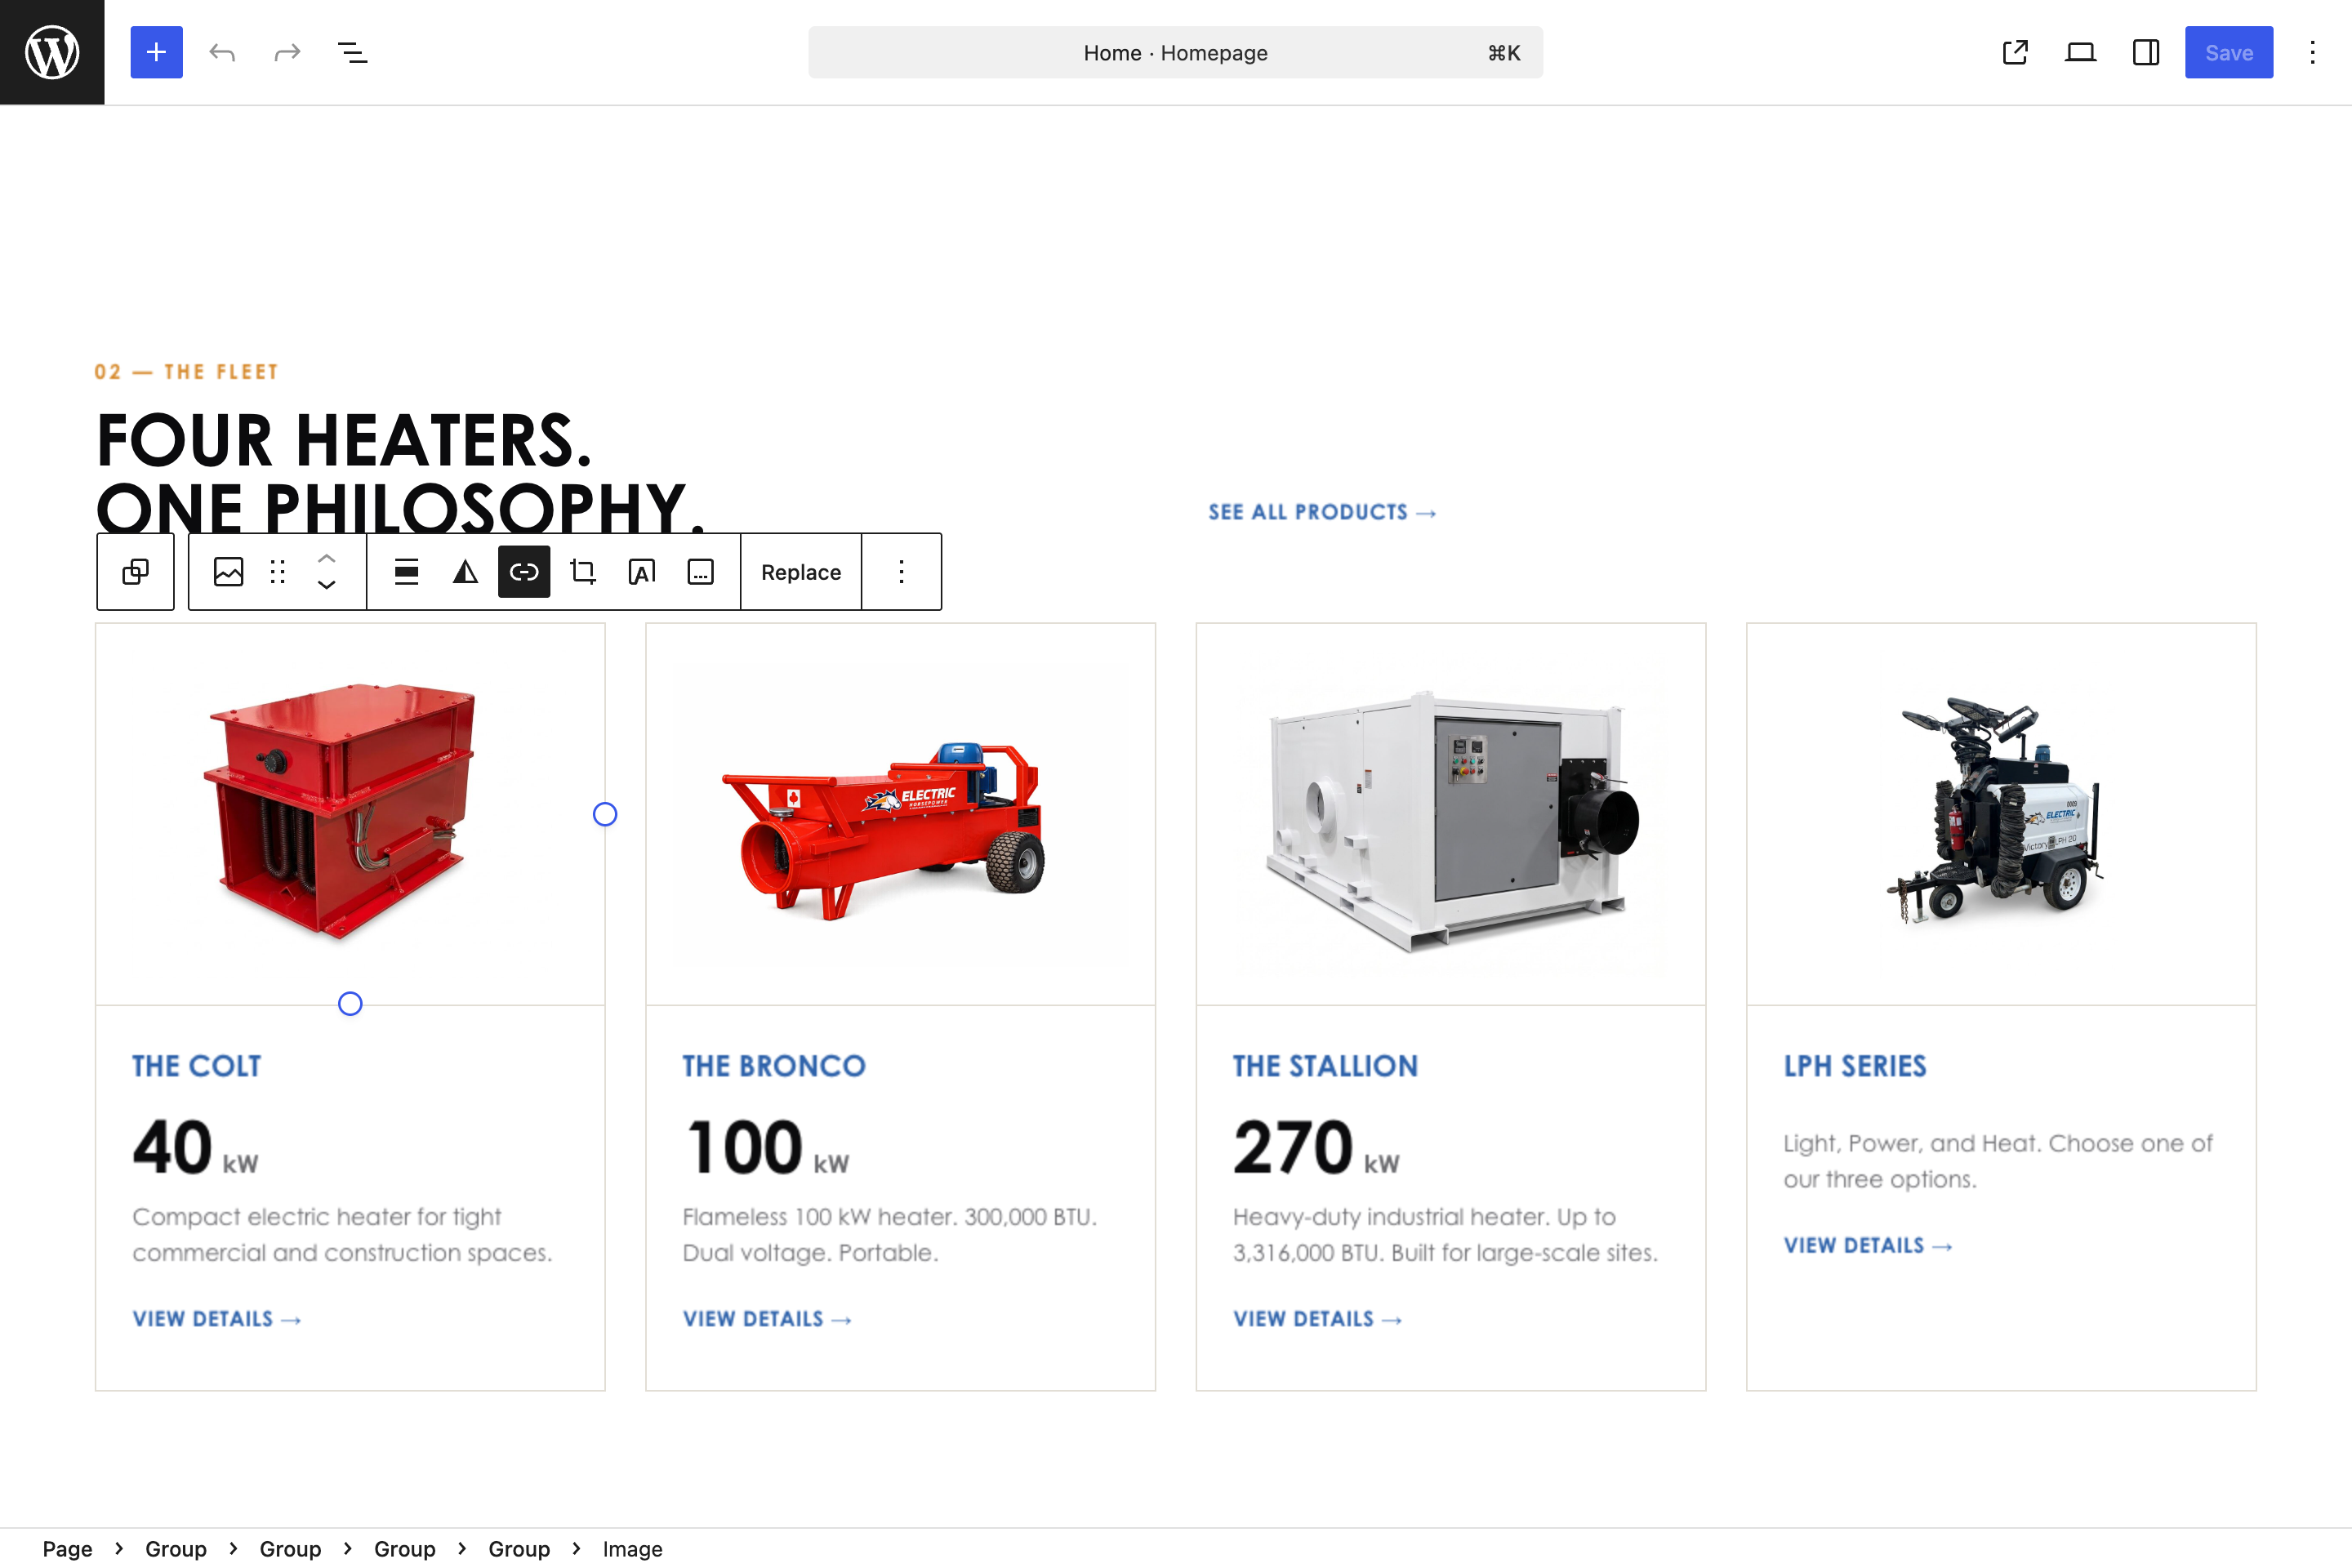
Every heater photo — the homepage fleet, Products, Rentals, Applications, the About montage, and each product page (including the Stallion and LPH thumbnail galleries) — is a normal WordPress image. Swapping one is three clicks, no HTML:
- Open the page (e.g. Pages → Home) and click the photo you want to change.
- In the small toolbar that appears above it, click Replace.
- Pick Open Media Library to choose an existing photo, or Upload a new one — then Update to save.
About page team photos
The leadership headshots work exactly like the product photos. Each card currently shows a neutral placeholder silhouette; drop in a real headshot whenever you have it.
- Open Pages → About and click the placeholder photo on a leadership card.
- Click Replace in the toolbar, then Upload the headshot (or pick one from the Media Library).
- Update to save. Headshots are cropped to a consistent portrait shape automatically.
Adding new sections
You don't have to build styled sections from scratch. A set of pre-made, on-brand blocks is ready to insert — a section shell, a four-card grid, the blue/gold closing call-to-action, a team member card, and a product card.
- In the editor, click the blue + button (top left), then the Patterns tab.
- Open the Electric Horsepower category and click the block you want — it drops in fully styled.
- Click into it and replace the placeholder text (and photos, per the sections above).
- Update to save.
The quote / contact form
The form on the Contact page is a “Contact Form 7” form called Quote Request. You edit its fields and the address submissions are sent to.
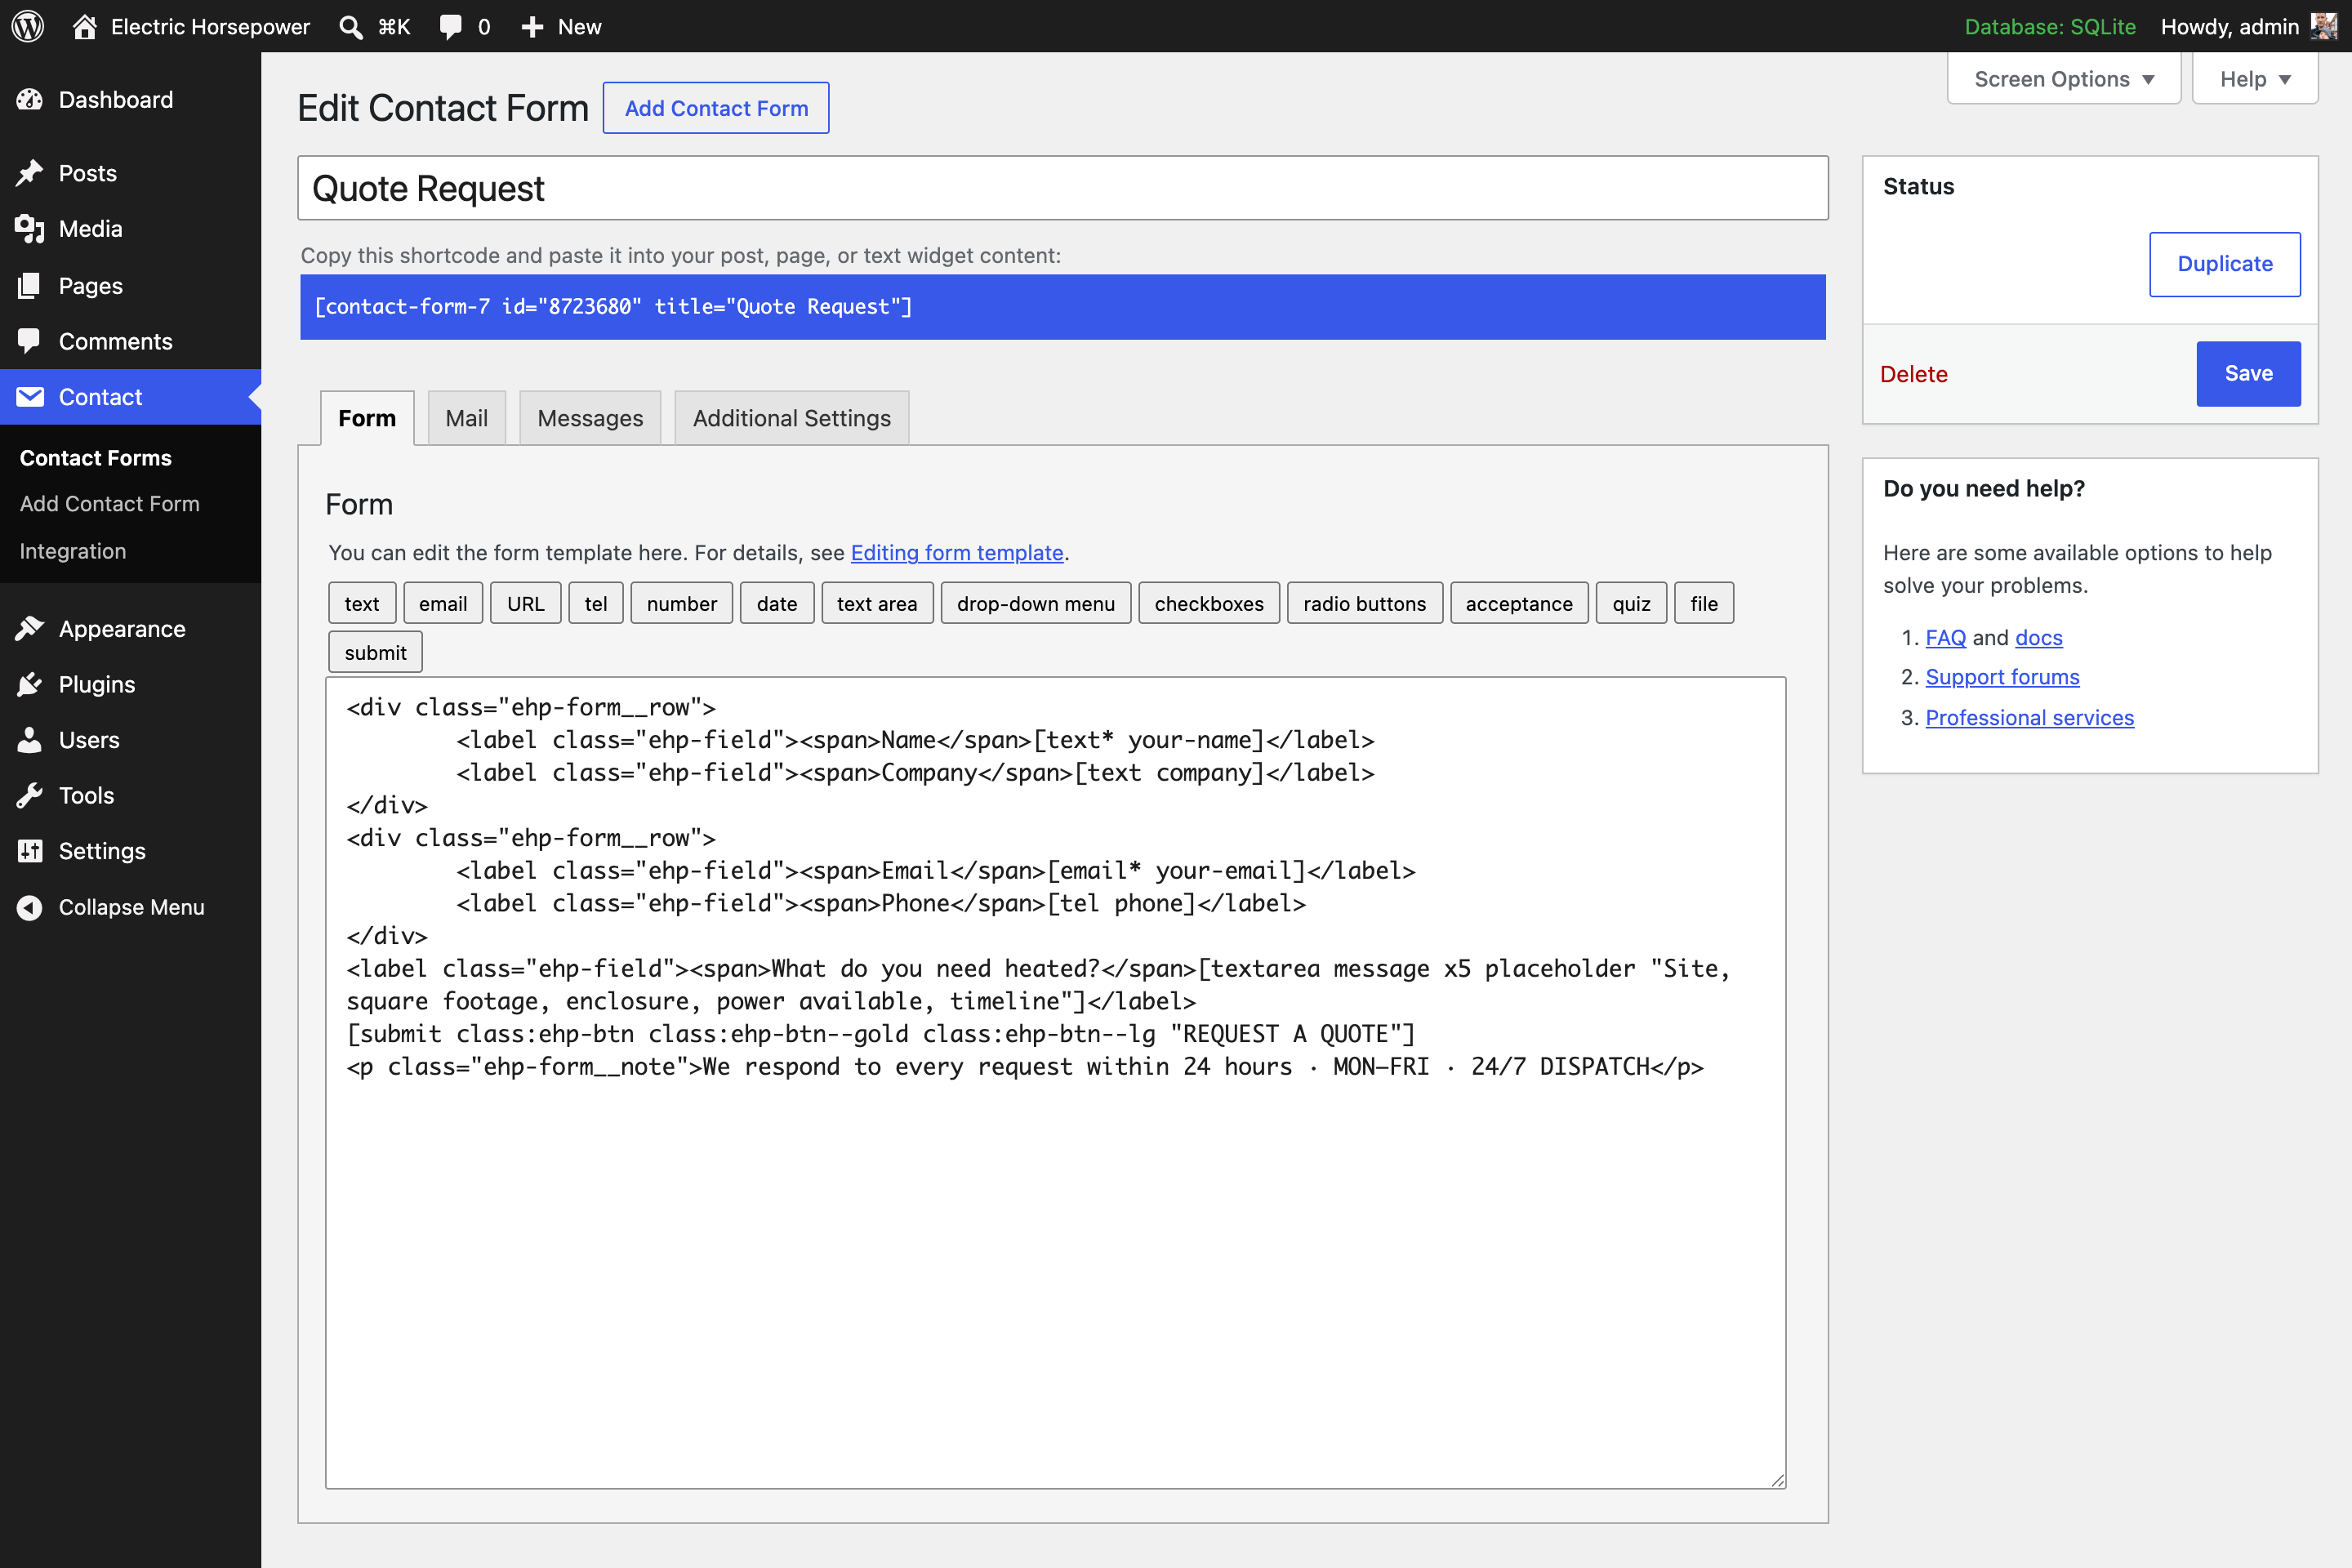
- Form tab — add, remove, or rename fields.
- Mail tab — change the recipient address (currently
sales@electrichp.com) and the wording of the notification email. - Click Save. The form already appears on the Contact page — you don't need to re-add it.
The BTU calculator
The heating-load calculator lives on its own page and is placed there with a single shortcode — a placeholder you'll see in the editor:
[ehp_btu_calculator]
You can freely add text above or below that shortcode from the dashboard. But the calculator's math and the list of recommended units are code, not dashboard settings — changing them is a developer edit to the theme file partials/btu-calculator.php.
The recommended-equipment table, for reference, is this list near the bottom of that file (model name and its BTU capacity):
const equipment = [
  { model: '375',    btu: 400000 },
  { model: '500',    btu: 600000 },
  { model: '650',    btu: 650000 },
  { model: '900 TA', btu: 1200000 },
  { model: '1200',   btu: 1300000 },
  { model: '2500',   btu: 2500000 },
  { model: '3000',   btu: 3300000 },
];
Google Analytics
The site is wired for Google Analytics — it just needs the account's Measurement ID (looks like G-XXXXXXXX) pasted in once.
- Open Appearance → Customize → Analytics & SEO.
- Paste the Measurement ID into Google Analytics ID and click Publish.
Quick reference
Where to go for the most common changes.
| What you want to change | Where to do it |
|---|---|
| Any page's wording / headlines | Pages → (the page) → click & type → Update |
| Phone, email, address, hours, CTA | Appearance → Customize → Site Contact & CTA |
| Top / footer navigation links | Appearance → Menus |
| Product & fleet photos | Click the photo → Replace (toolbar) → Media Library |
| Team headshots (About) | Click the placeholder → Replace (toolbar) → Upload |
| Add a new styled section | Editor → + → Patterns → Electric Horsepower |
| Quote form fields & recipient | Contact → Quote Request → Form / Mail tabs |
| BTU calculator math & models | Theme file partials/btu-calculator.php |
| Google Analytics ID | Appearance → Customize → Analytics & SEO |